
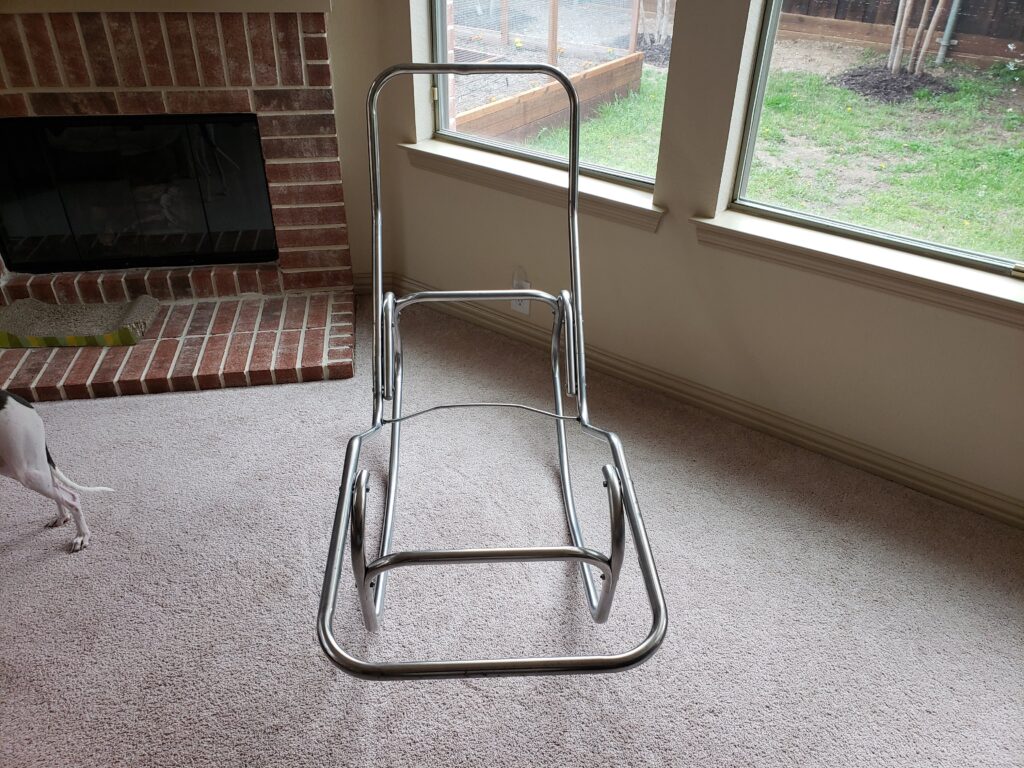
A new cover and set of springs will go a long way in maintaining your Barwa chair’s use and beauty, but properly polishing the frame can make it look almost new. This post will walk through the method we used to polish our Barwa frame with just a few inexpensive supplies, some elbow grease, and patience. Our goal with this process is to bring your frame to its full potential, not necessarily remove every single scratch, ding, or imperfection on the frame. I found that bringing the metal to a nice shine helps hide some of the imperfections, and they’re only visible upon very close inspection. Depending on the specific condition of your frame, you may find that courser sanding grit is required for certain parts. Use your judgment and feel free to diverge from what’s recommended here based on your situation. If perfection is what you’re after maybe consider looking into having the legs chromed just as Edgar Bartolucci, one of the designers of the Barwa, did on his own personal chairs. Also, please leave comments if you have suggestions for alternative methods or other improvements that would be helpful to others.
A quick disclaimer: this post is intended for aluminum Barwa frames that *do not* have an anodized color coating. The processes described here will work for most Barwas, but if your frame is made of steel (is it magnetic?) or has an anodized coating please do not follow the advice on this page.
Update!! A much easier method!
Fellow Barwa aficionado Todd wrote to us with an excellent alternative path to the much more labor intensive approach described in this original post. I recently tried this on a frame that we picked up in Phoenix. This frame was in good shape, but as it was used outdoors for decades, you can imagine it needed a good cleaning before using the chair in our home. The longer process below can take an entire weekend, and yes I still think it can get better results, but I was able to completely clean this frame and make it look incredible in about two hours. I liked this approach so much that I recommend everyone do this when changing covers. Anyway, here’s what Todd sent:
For the frame, I used a process that works well for Eames Aluminum Group chairs I’ve restored, it goes very quickly and has a great result, polishing without removing any of the original tooling marks of the tubing:
First, crumple some aluminum foil, dip it in water, and rub vigorously over the frame. This will remove the oxidation without scratching. Then, polish with Mother’s Aluminum Mag Wheel polish using a soft cloth. Less than two hours to complete the work!
Mr Todd
The Full Process for a Deep Polish:
Polishing the metal of your Barwa frame works a lot like finishing wood except it’s more time-consuming as the material is harder. Essentially, there are three steps: cleaning, sanding, and polishing. Most of the time is spent sanding where we’ll work each piece of the frame through different grit levels of micro-mesh, starting with the roughest and ending with the smoothest. Each level is removing the scratches of the previous grit until the metal looks shiny and polished. Be advised, this can be a time-consuming activity. My recommendation is to take your time, enjoy the process because the results will be worth the work. Not only will this make the legs of the chair look incredible, but polishing the top of the frame will help the cover last longer. If you’re changing the cover on your chair, now is a great time to completely disassemble the frame a polish it up. This section of our YouTube tutorial is where I cover the polishing part. It’s not as detailed as this post, but I show different parts of the frame through the stages and you can see the results of this process.
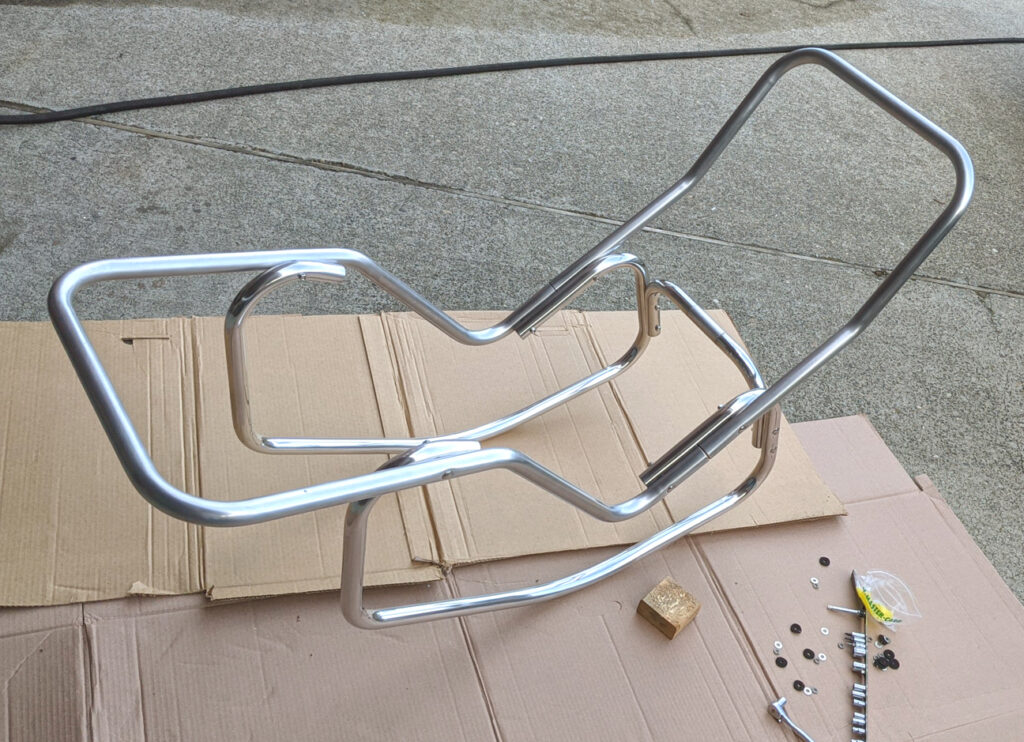
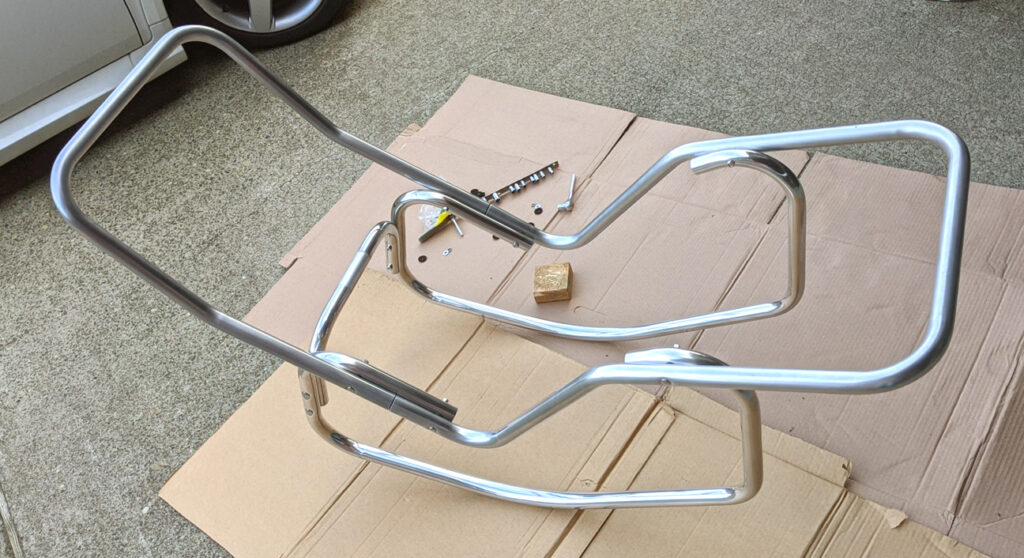
Step 1: Disassemble and cleaning
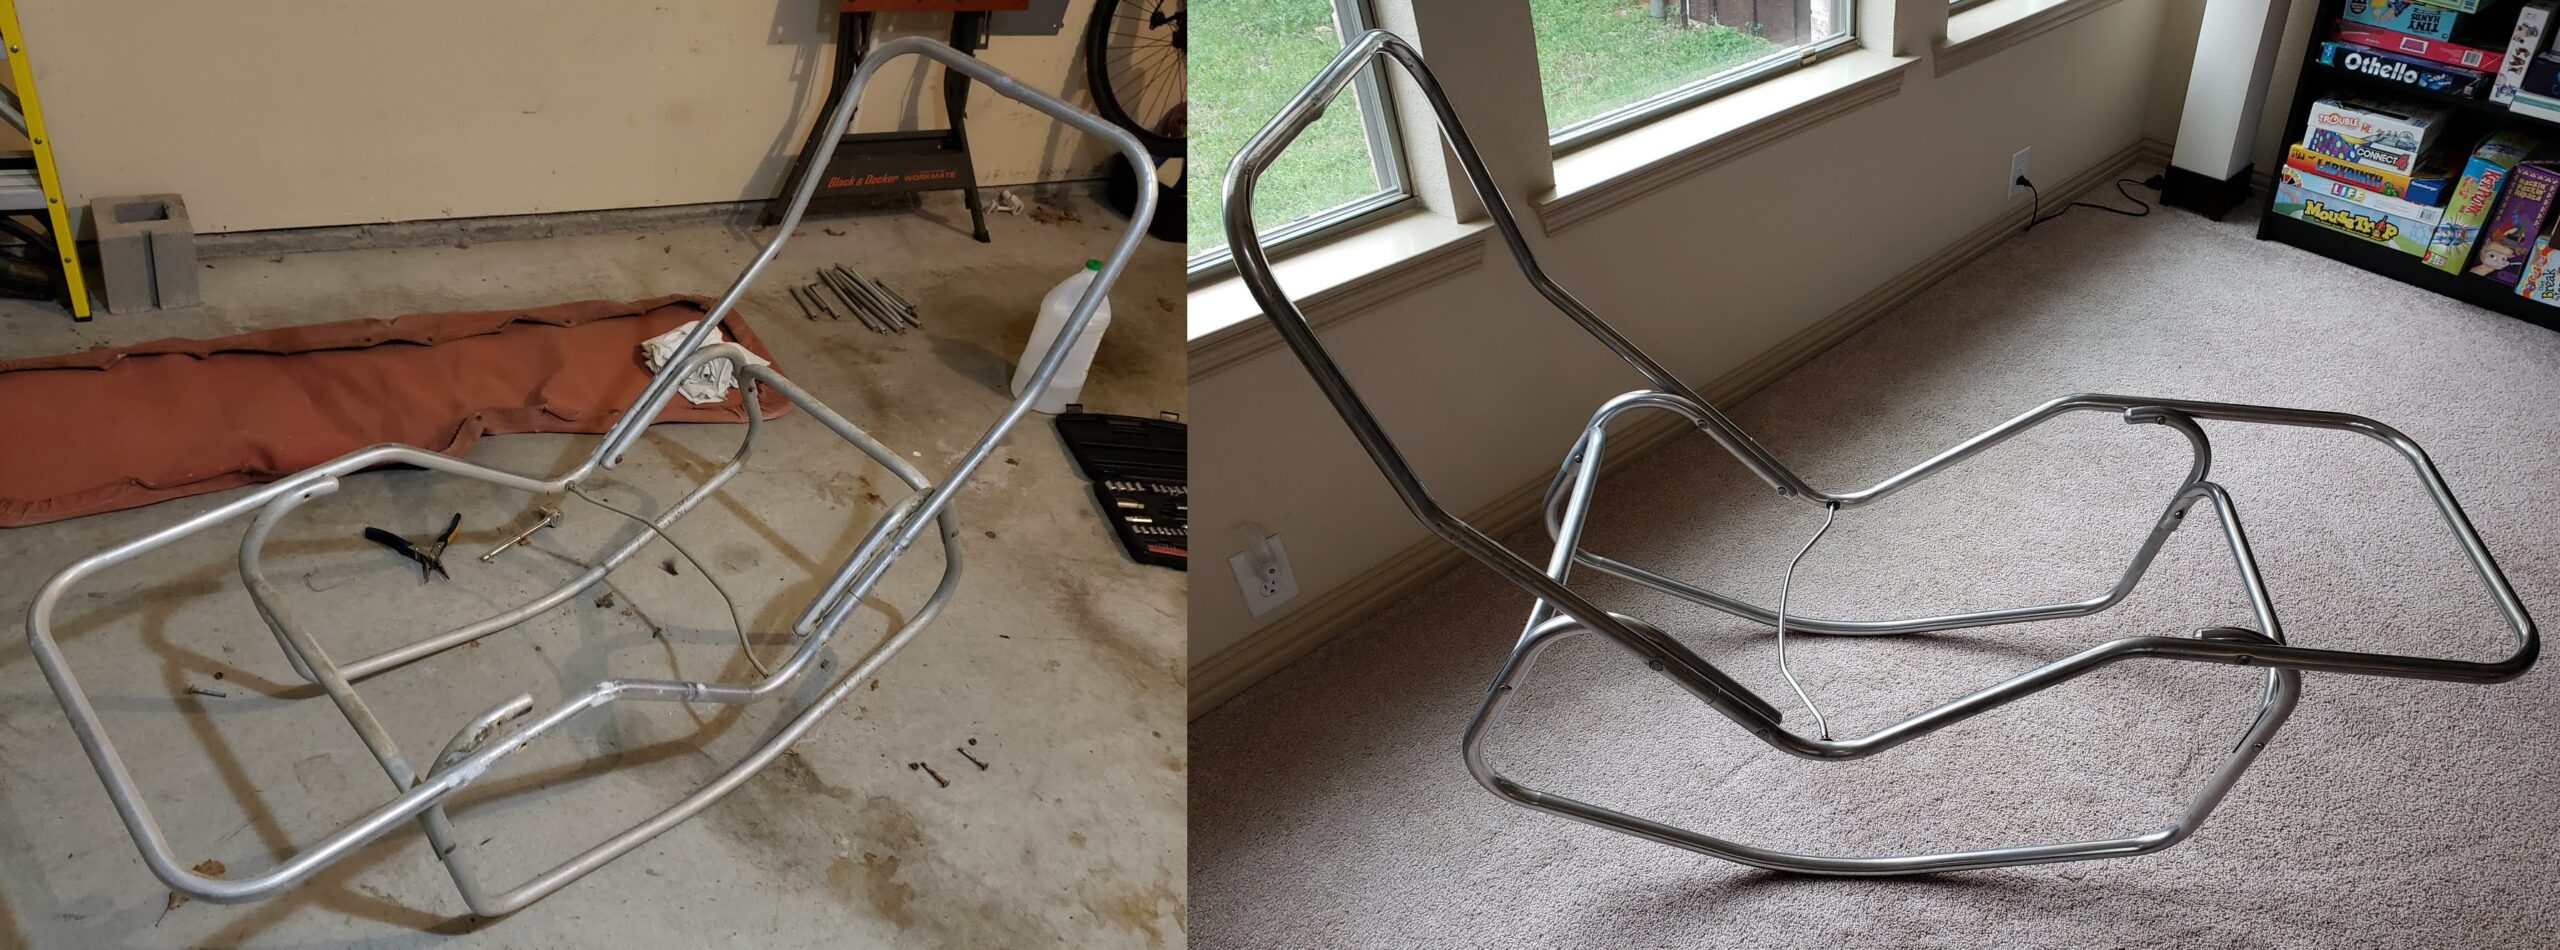
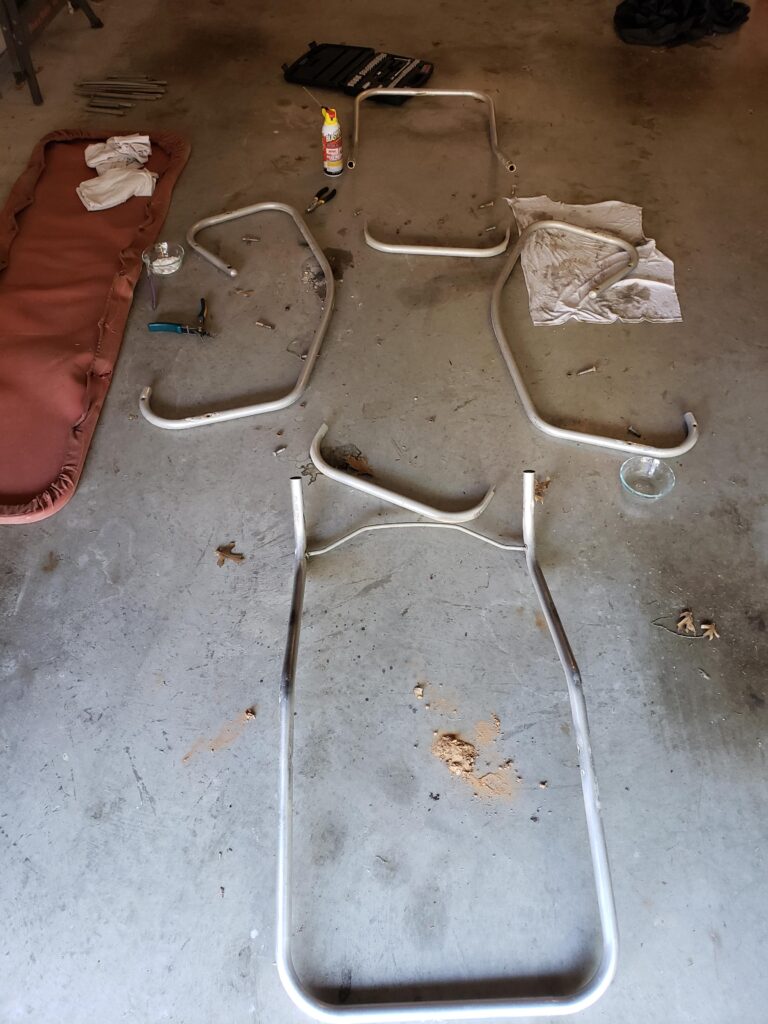
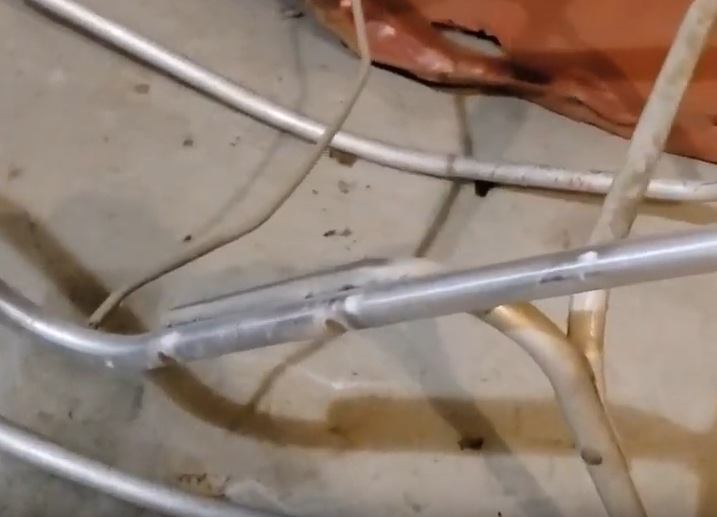
We recommend fully disassembling the Barwa frame before you begin polishing. There are a total of ten bolts that will need to be removed. If the bolts are rusty and need to be replaced, the longer ones can be purchased at any hardware store, and the shorter 1 1/4″ bolts can be ordered online. The polishing process can be messy; wearing disposable craft or latex gloves will simplify some of the clean-up.
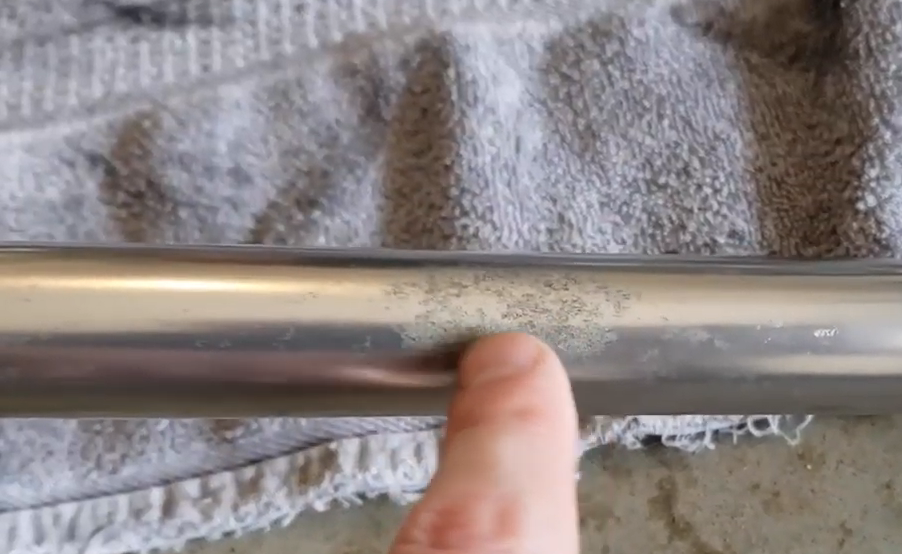
The chair in these photos was ~70 years old and had spent most of its life outdoors. We removed the initial layers of dirt by dipping 0000 steel wool in vinegar and scrubbing each piece. We now believe it’s faster and arguably more effective to simply wad up some aluminum foil, dip it in water, and rub the frame with it. This will remove dirt as well as oxidation. Dry each piece with a rag or towel before moving on to the next one.
Step 2: Sanding
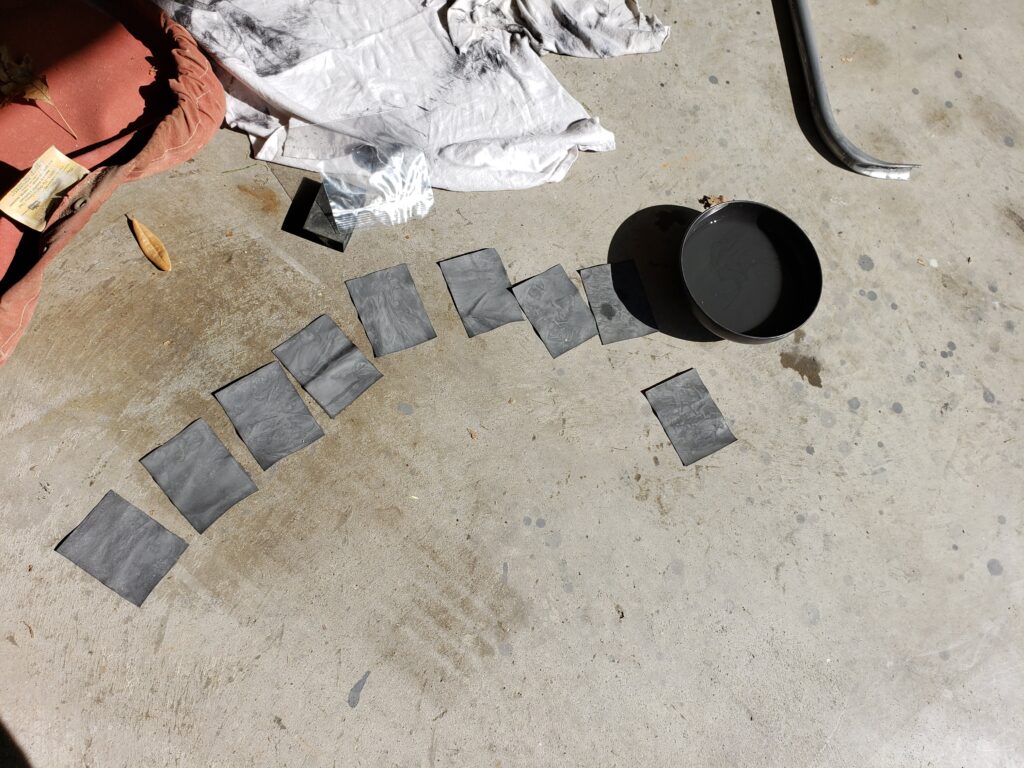
Next, spread out each grit of micro mesh in order and we’ll work through each one starting with 1500. You’ll also need a small bowl of water to dip the micro mesh in periodically. Wet the first sheet of micro-mesh, hold the piece of the frame with one hand and start sanding in a long ways back and forth motion with your other hand. Take your time and sand all sides of the entire piece. Metal slurry will begin to form as you go; this is good and means you’re making progress. It’s good to wipe slurry off with a rag regularly and keep wetting the mesh. Once you’ve completely sanded the piece, wipe it down, and move to the next grit. We’re going to do this through nine levels of grit. Be patient, stick with it, and don’t slack on completely sanding the piece with each grit, it’s worth the result.
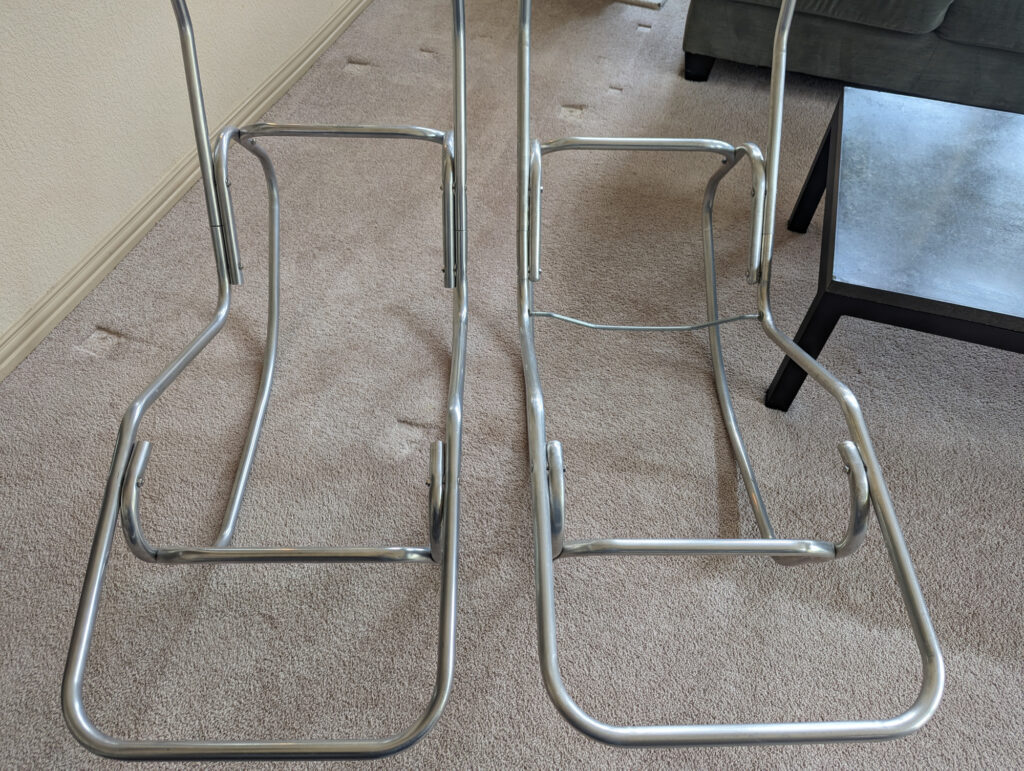
I’d recommend starting with the legs of the frame as the parts are smaller and easier to handle. Also, since this is the most visible part of the chair, it’s good to work on it while you have the energy. The top of the frame isn’t visible, so if you want to sand a little less on this part it’s totally fine. What’s most important with the top is to polish any rough spots that correspond to where the springs attach; some of these required rougher sandpaper to get smooth. The two that were really bad I used 300, 400, then 800 grit paper before using the micro mesh. The exact grits don’t matter but if rough spots have developed here, it may reduce the life of the cover. This is the one part of the polishing that’s structurally important and it doesn’t take long to fix as the spots are relatively small.
Step 3: Polishing the Barwa Frame
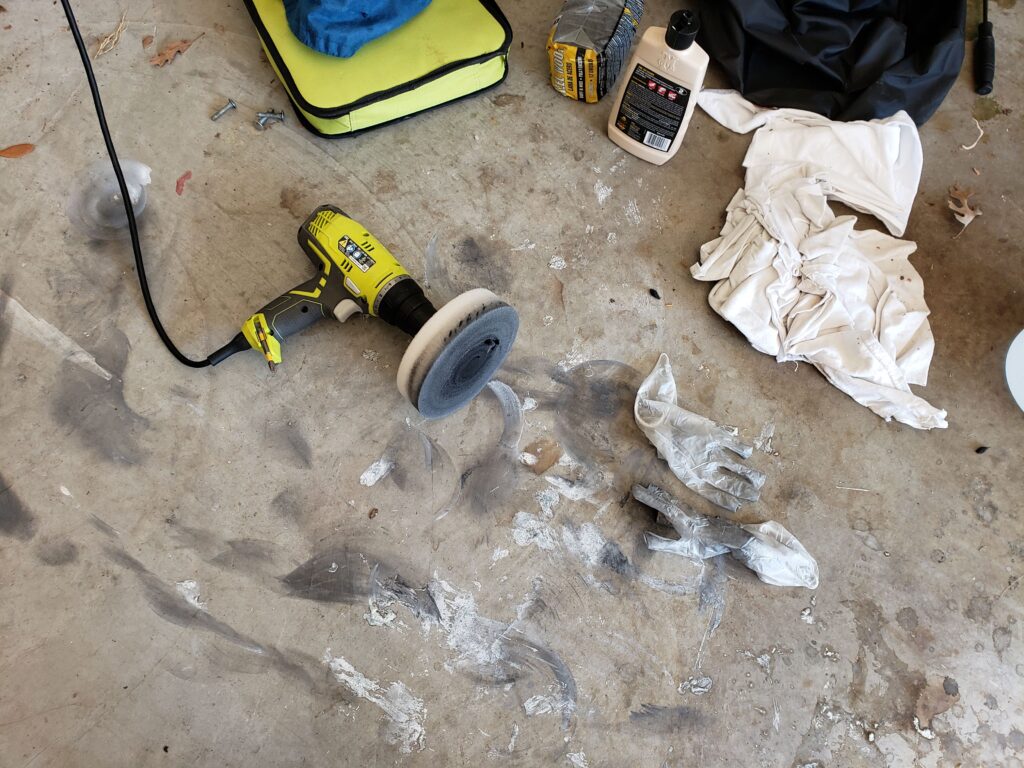
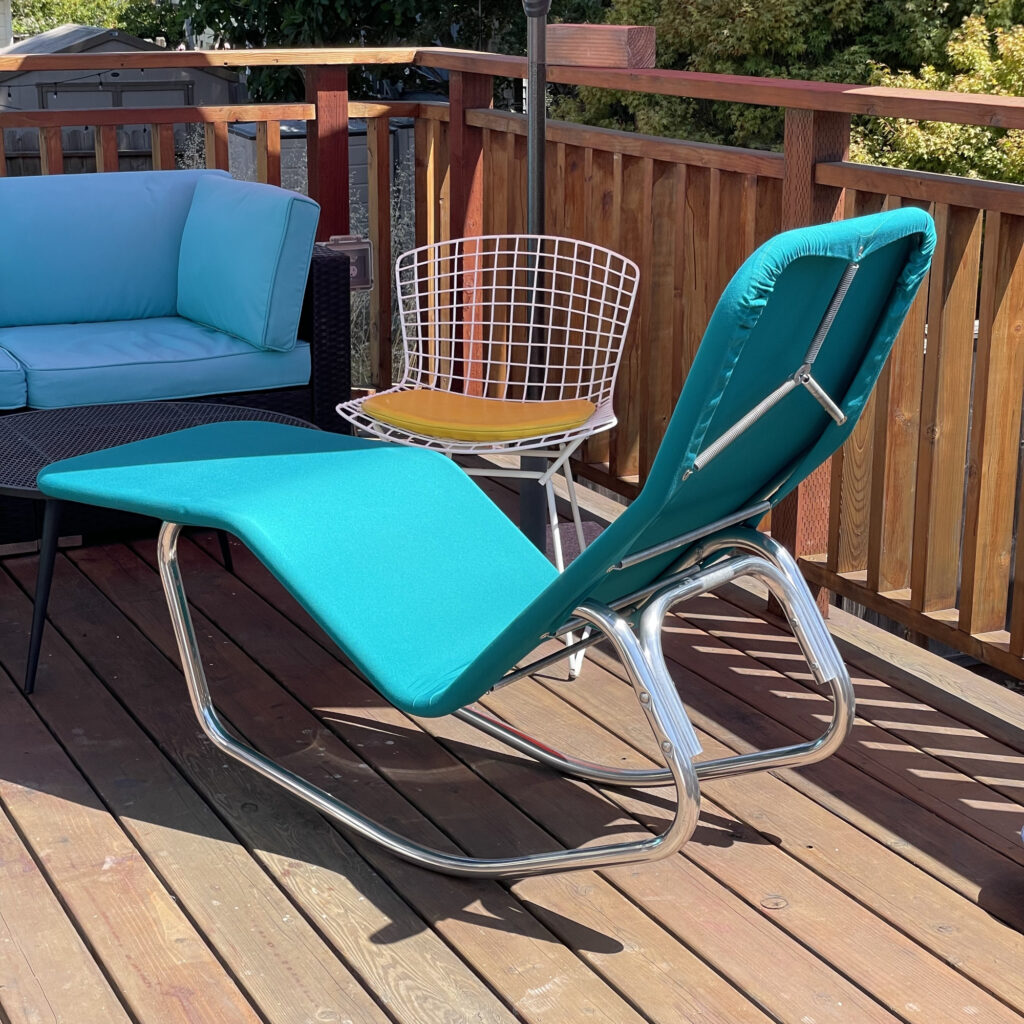
Now that we’ve gone through the micro-mesh, the surface will be super smooth but the finish will appear somewhat dull. This next step is really what makes it look incredible. We’re going to use a foam pad with some Meguiar’s Mirror Glaze and buff it using a drill. A dedicated buffer wheel can be easier and potentially safer, but a drill can produce very similar results and most people already have access to one. Place the piece of frame on a surface that won’t scratch. An old towel works fine, but be careful not to let the pad make contact with the towel as it can wrap around the drill very quickly and fling the piece of frame. I found applying the polish directly to the pad works best. A couple of slow turns will help spread the polish on the pad, then speed up the drill and let the polish do what it does best. Hold the frame piece firmly while polishing to make sure the drill doesn’t fling it. The pad will turn dark black, but don’t worry that’s expected and not a problem. After each side of the piece has been polished, use a clean cloth to remove any remaining polish residue. I also had an old bottle of Meguiar’s Quik Detailer and used that to help remove the polish residue. If you don’t already have some I don’t know that it’s necessary to buy, wetting a rag with water is likely to get the same result.
Now Enjoy Your Fabulous Frame!

I spread this out over two weekends, so don’t get discouraged if you find your arms are getting tired from all the sanding. Just take breaks, go slow, and I promise it’s worth it. I mean, just look at those legs!!
Now, put your cover on and enjoy your beautifully polished frame that will look gorgeous for years to come!!
Update!
Fellow Barwa connoisseur Tim wrote in with an amazing example that show what’s possible when polishing a frame. Don’t feel bad if your frame doesn’t come out looking as good as his; he has years of experience polishing different metals. Regardless, his results are astonishing and serve as an inspiration for my next refurbish. Direct from Tim: “I use lots of wet/dry sandpaper and Scotchbrite of various grits. Lately I started using Mothers Mag & Aluminum Polish for a Herman Miller Burdick desk, which beats the heck out of any aluminum polish I have ever used, including my standard standby Simichrome. As a final finisher, I have recently been using Renaissance Wax. […] It’s hard to capture the exact character in photos. I’m happy with it.”

Tim, thanks so much for tips and congrats on your beautiful Barwa restore!
Great post! Aluminium polishing is such an important step to enhance both the appearance and durability of aluminium surfaces. I’ve found that using the right polishing compounds and soft cloths makes a huge difference in achieving that mirror-like finish. It’s also great to see tips about preventing oxidation after polishing — maintenance really matters! Looking forward to more insights like this.