
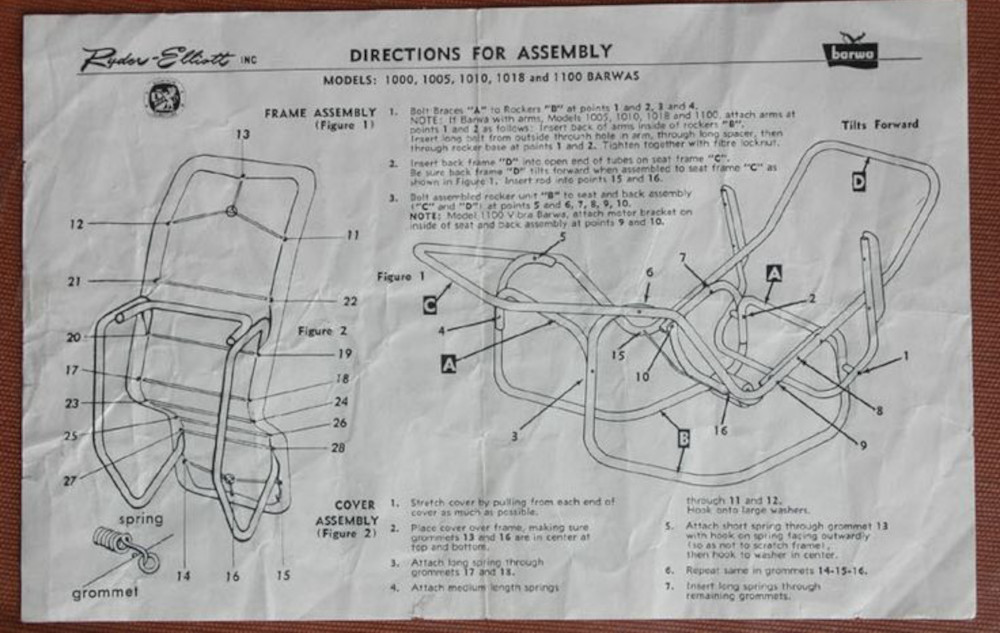
Installing a barwa cover is very simple, but it does require a good deal of hand and forearm strength. Stretching the springs can be challenging and we recommend working with a partner to help. Also, please use care when placing the springs in the grommets. If the hook of the spring misses the grommet, it can tear straight through fabric with enough force, or worse, cause injury to your hands. If you have any questions please don’t hesitate to reach out to us at barwachair@gmail.com
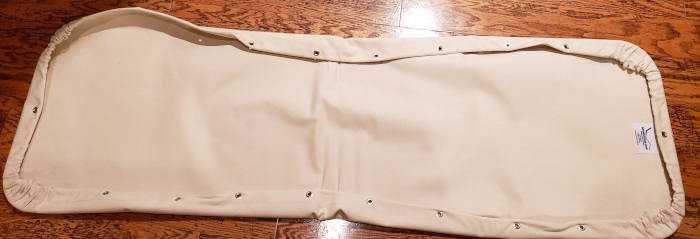
Spread the cover, top-side down, on a flat surface.
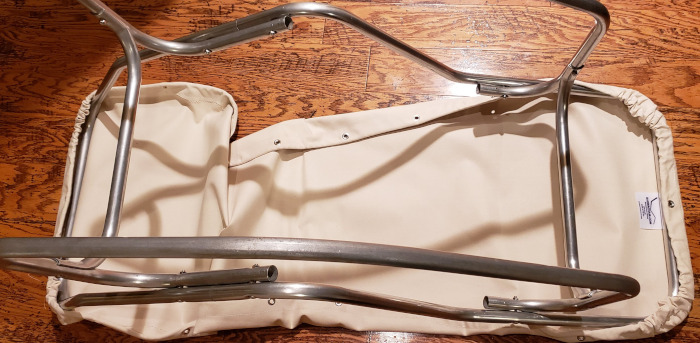
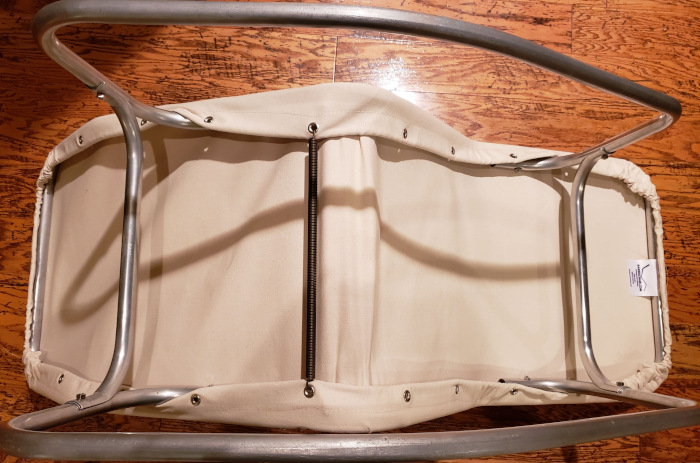
Place the frame on top of the cover ensuring the foot of the chair is on the end with the tag. Our covers are designed to only fit this way and will not look right if installed upside down.
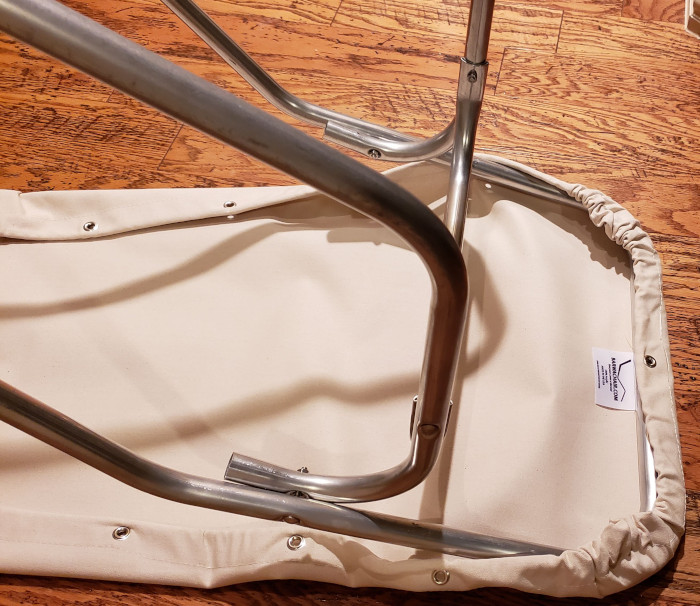
Tuck the two ends of the frame into the cover and ensure the grommets are aligned in the middle.
Pull the sides over the edges of the frame and double check the grommet alignment. It will be a tight fit. You may find it easier to tip the chair on it’s side and pull the last side downward towards the floor.
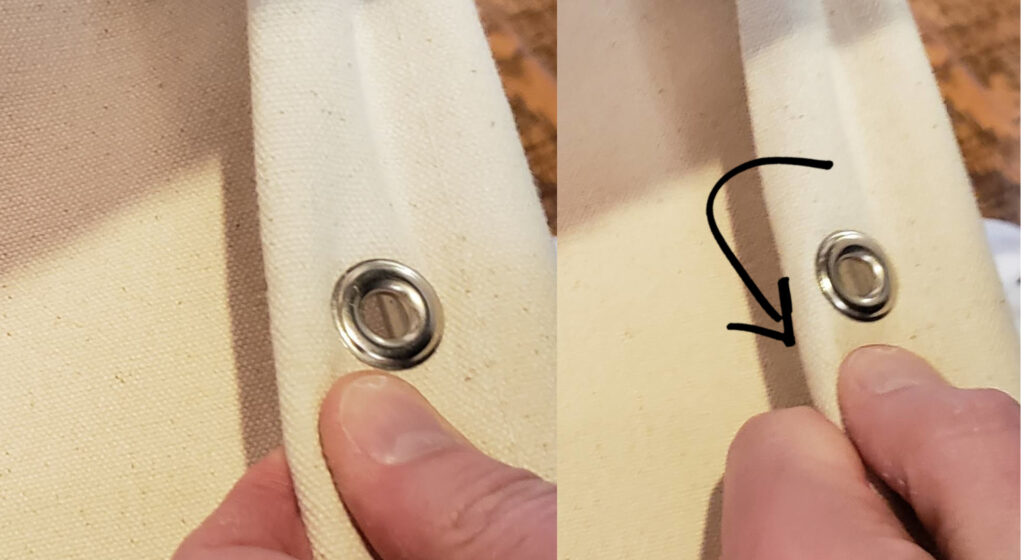
We find it easier to install the springs with a “pull” rather than “push”. Place the spring in the grommet on the far side of the chair and pull it toward you. With your other hand, tuck the chain or cable downward so the spring hook can more easily be inserted into the grommet.
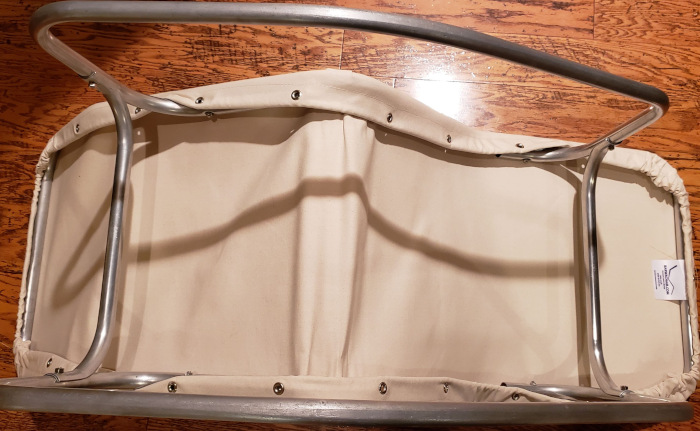
Place one of the long springs across the middle section of the chair. Use the stitch line to ensure the cover is centered on the frame.
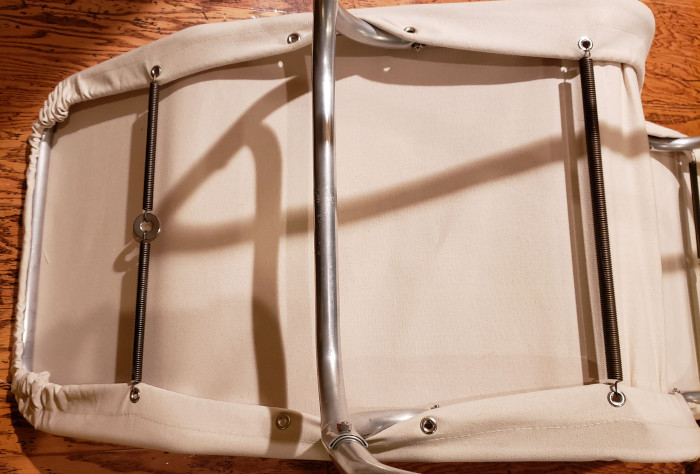
At each end of the chair place two medium springs in the grommets and connect them to a washer. Continue checking the stitch line and adjust the cover so that it stays centered.
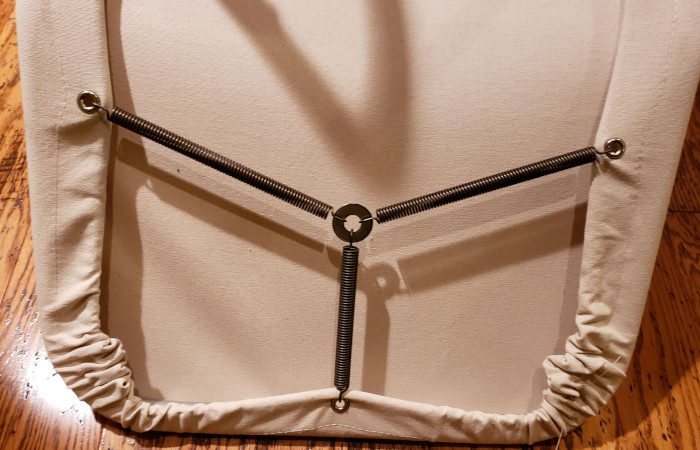
At each end, use one of the two small springs to connect the washer to the grommet on the end of the cover.
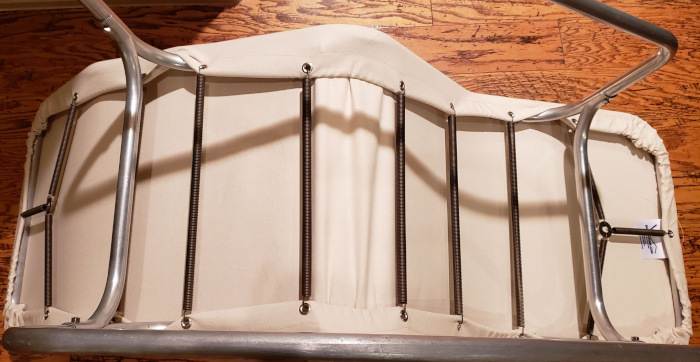
Add the remaining large springs to the corresponding grommets on each side as pictured. Working from the head toward the foot of the chair is the easiest order to install the remaining springs.
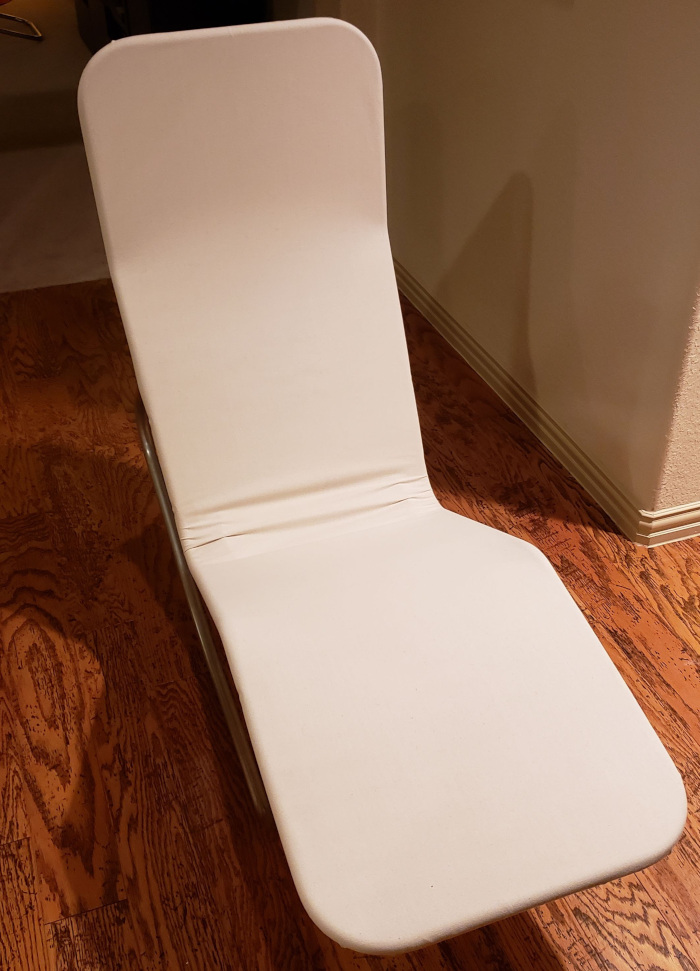
Turn the chair over and smooth out any wrinkles and enjoy one of the most relaxing chairs ever made!
I’m so thrilled these chairs are back. They take all the pressure off places that are sore, arthritic or sport’s injuries. Never have I fallen in love with a chair-this is the ONE!
Thanks Betsy! We couldn’t agree more, and I use our Barwas practically every day. The design is brilliant.
Why are these not in production? The design is so simple. Patent issues? Design copyright ?
Good question! We don’t know exactly, but we are in the process of making frames and hopefully in the next few months will be able to sell the entire chair.
I inherited one of these from my grandmother and am excited to try a cover made of a fabric that possibly won’t fade and tear as quickly as the cotton canvas. Also, to find replacement springs is thrilling—my chair has been sidelined for years due to a couple of stretched out springs.
Hey Ruth, it sounds like you are in the exact same place we were a few years ago! We will do our best to get you up and running!
I took my old cover off, and put the new cover on with the original old springs, and the new cover has one more set of grommets than the old cover used. I’m now one spring short.
Hey Jeff,
That’s interesting that the grommet layout was different. We have individual springs and can get you one for the cover.